
A Comprehensive Guide to the Rsync Command in Linux

As a Linux user or system administrator, synchronizing directories or sharing files between systems manually can be time-consuming. Imagine you’re in the middle of transferring important files, and the connection drops; without the right tool, you'd have to start over from scratch.
That’s where the rsync command comes in. It allows you to resume file transfers without missing a beat, saving time and effort. In this guide, we’ll take a closer look at the rsync command, exploring its features and providing practical examples to help you make the most of this powerful tool.
What Is Rsync?
The rsync command is a powerful tool for copying and synchronizing files. It supports local file transfers, remote transfers over SSH or other shells, and even communication with an rsync daemon on a remote system.
The standout feature of rsync is its delta-transfer algorithm. This method only sends the parts of files that have changed, which saves time and bandwidth. That’s why rsync is widely used for backups, mirroring, and efficient file transfers.
Basic Rsync Syntax
Before we get into examples, let’s look at the basic syntax of rsync:
rsync [OPTION] SRC DESTHere's a quick breakdown:
OPTION: Controls the transfer settings, like verbosity or compression.
SRC: The source file or directory.
DEST: The target location, which could be local or on a remote machine.
USER: Username for remote access.
HOST: IP address or hostname of the remote machine.
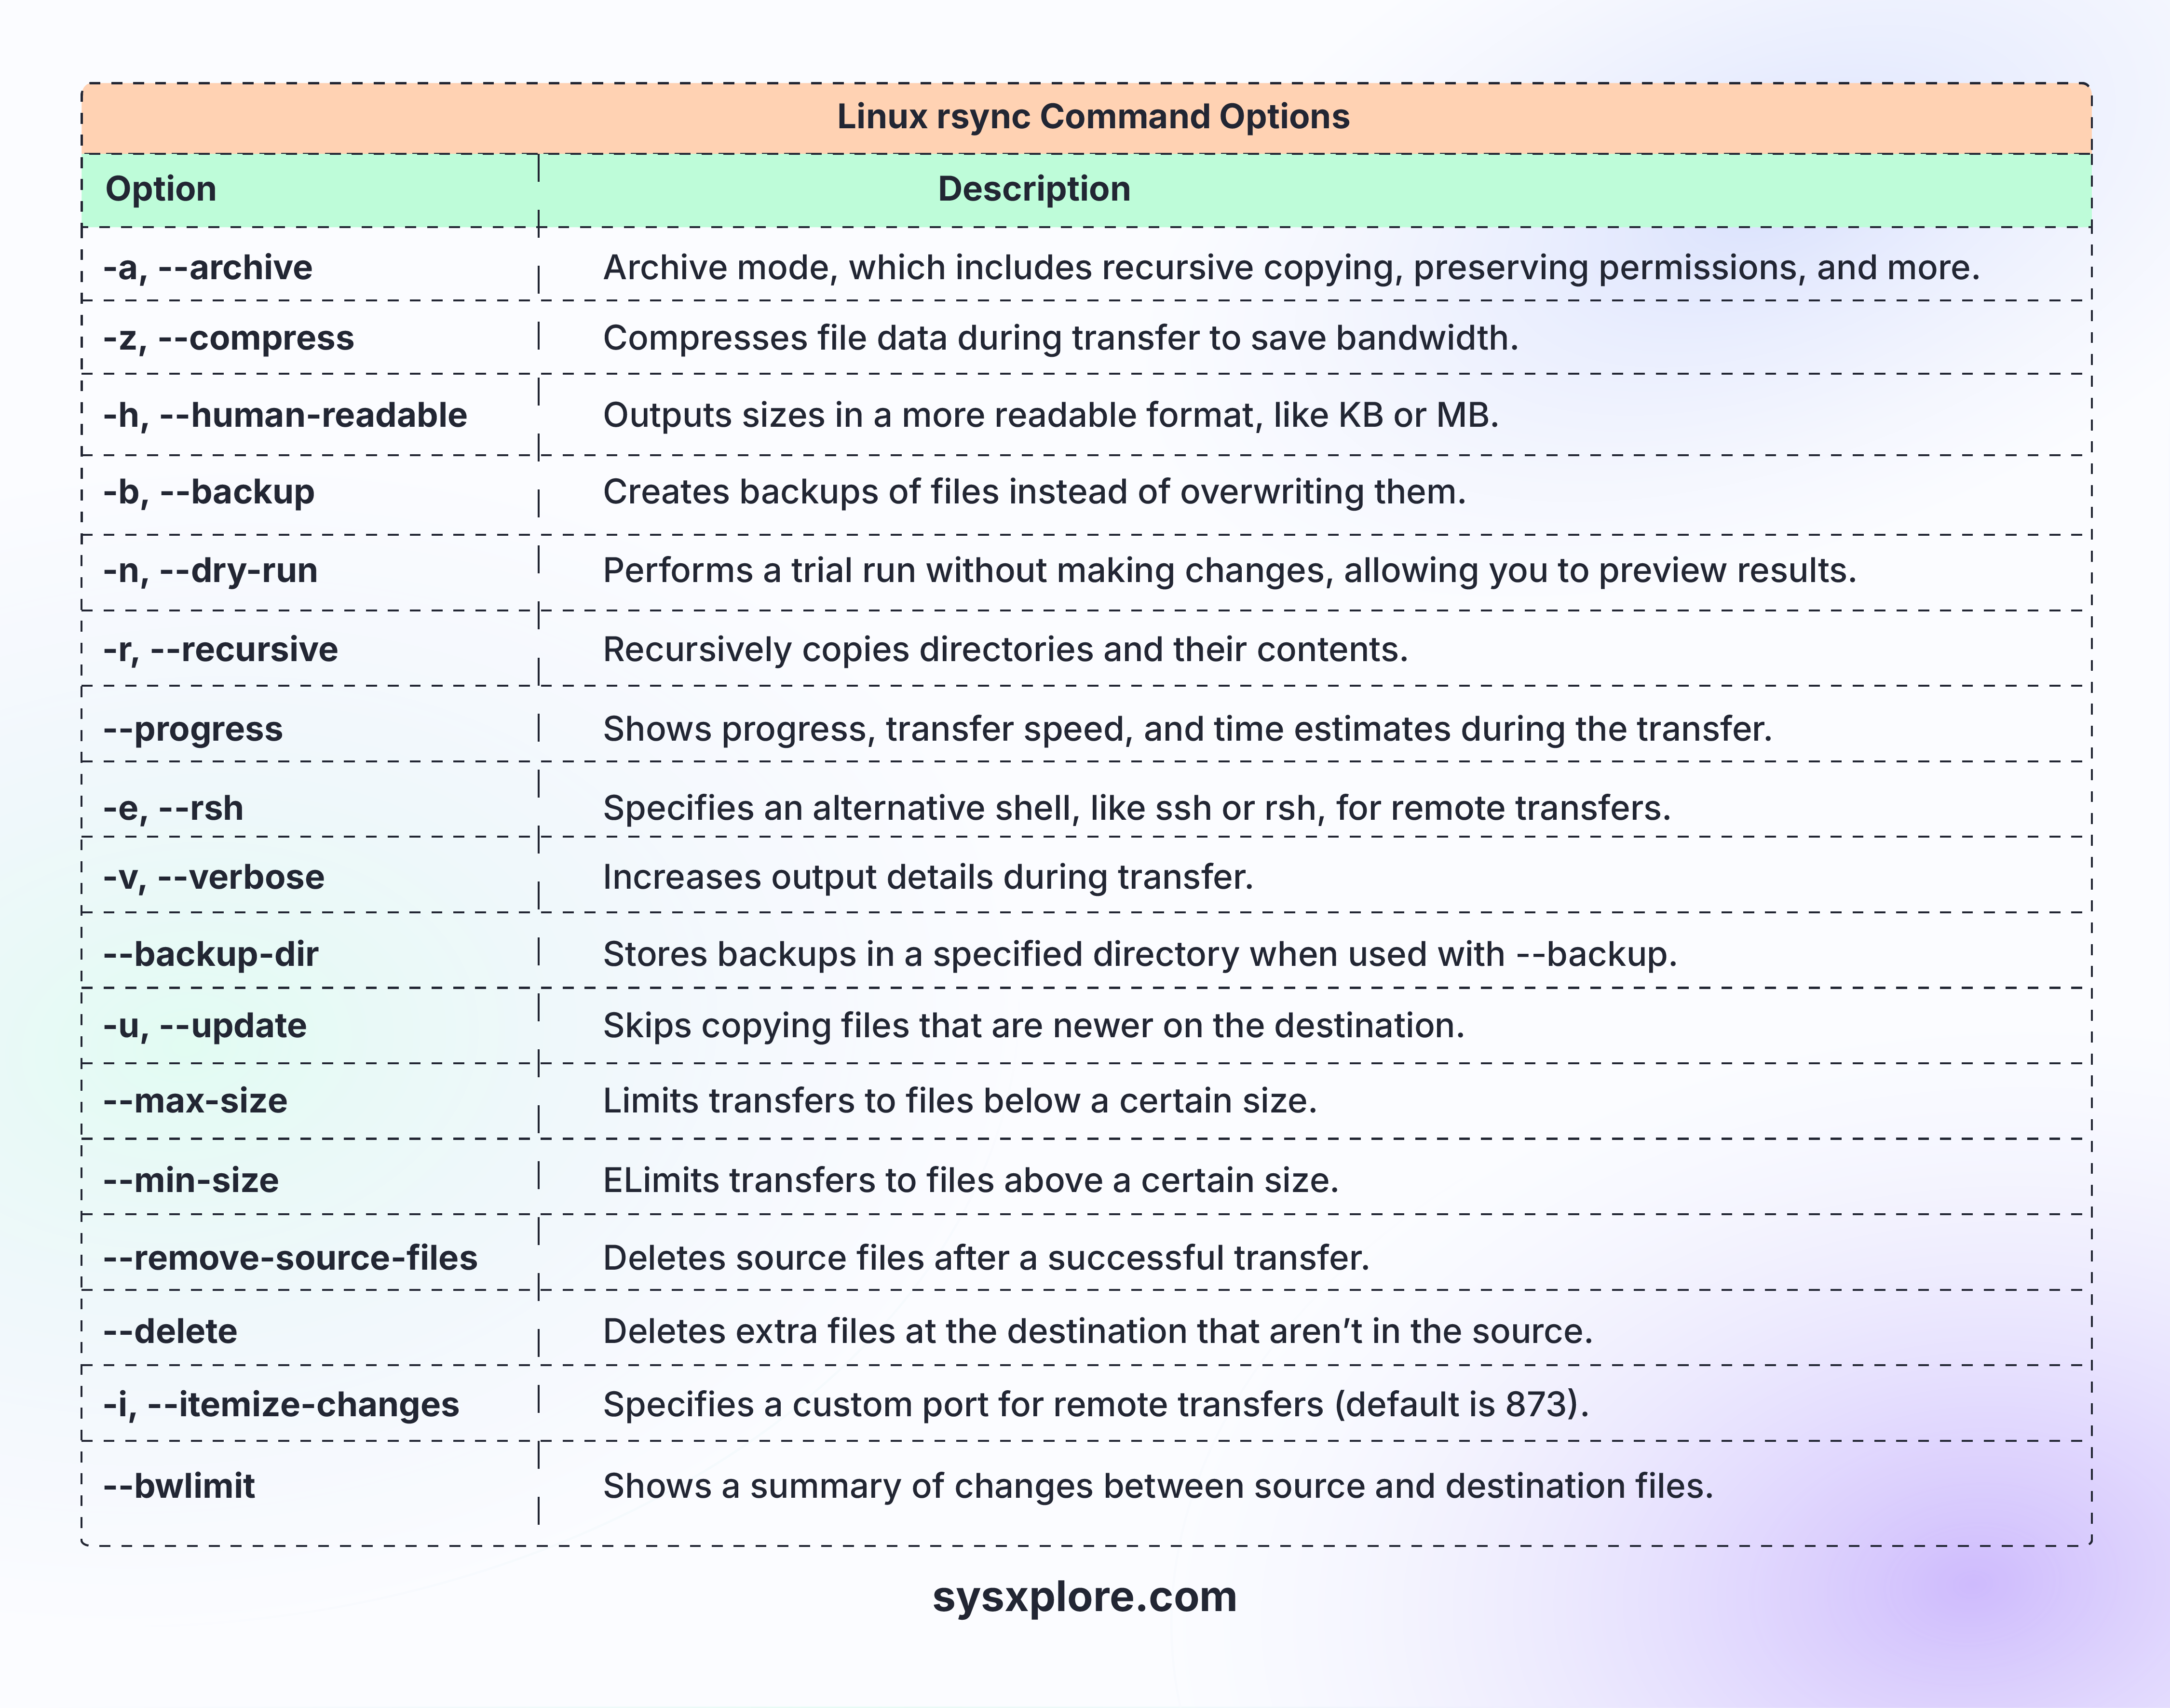
Essential Rsync Options
The rsync command provides a range of options for fine-tuning transfers. Here are some of the most commonly used ones:
Practical Examples of Rsync
Let's now take a look at some examples to see rsync in action.
