Part 3: Containers Are Just Linux Processes
In the previous part, we explored how PID namespaces isolate process trees, allowing each container to have its own “init” process and private view of running processes. Now that you understand how process isolation works at the kernel level, let’s zoom out for a moment.
Before moving on to network namespaces, it’s important to grasp a key concept: containers aren’t virtual machines or special kernel objects, they’re just ordinary Linux processes.
Tools like Docker, Podman, and containerd build on what the Linux kernel already provides. They bundle namespaces, cgroups, and a filesystem view into a single convenient abstraction and call that a container. But underneath, nothing extraordinary happens, the kernel is simply spawning and managing regular processes, just like it always has.
One of the most appealing things about containers is that you don’t need to understand how they work under the hood to use them. Tools like Docker provide a simple interface that hides much of the underlying complexity, you can build, run, and stop containers without ever thinking about what happens inside.
But to truly understand containers, it helps to see what they really are from the system’s point of view. Since containers rely on Linux kernel features like namespaces and cgroups, we can use ordinary Linux commands to inspect and even interact with them directly, no container tooling required.
In this part, we’ll do exactly that. We’ll use simple Linux tools, commands like ps and the /proc filesystem, to uncover what’s happening behind Docker’s abstraction and prove that containers are, in fact, just Linux processes running in isolation.
Are Containers Essentially Linux Processes?
When you start a container, you’re not launching a virtual machine or a separate operating system. You’re simply starting one or more isolated Linux processes.
Container runtimes like Docker, containerd, or CRI-O achieve this isolation by using namespaces and control groups (cgroups). Namespaces limit what a process can see, its view of PIDs, filesystems, networks, and users, while cgroups limit what a process can use, CPU time, memory, I/O bandwidth, and so on.
Together, these two mechanisms form the core of containerization. They allow a process to believe it’s running alone on the system, when in reality it’s just another process under the same kernel.
You might be wondering: are containers really just processes? Let’s confirm that using a few hands-on experiments.
Before we begin, make sure you have:
A Linux host or virtual machine with Docker installed.
Any container image available, we’ll use Redis for this demonstration.
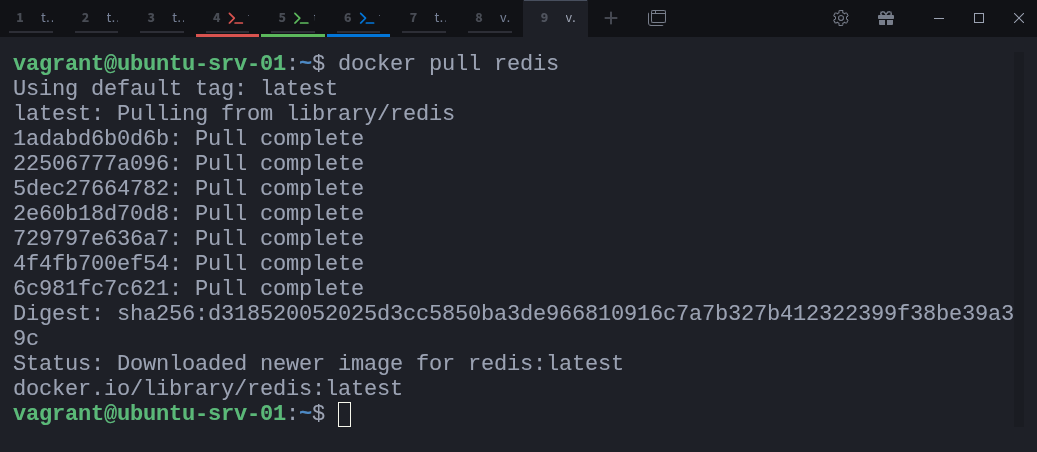
Let’s start by pulling the Redis image from Docker Hub:
$ docker pull redisNext, check if there are any Redis processes currently running on your host:
$ ps -fC redis-serverAt this point, there should be no output, since no Redis instance is running yet.
Now, start a Redis container named redis-demo:
$ docker run --name redis-demo -d redisOnce it’s up, run the same ps command again:
$ ps -fC redis-serverThis time, you’ll see a Redis process in the list, complete with a process ID (PID) assigned by the host kernel. That’s because Docker didn’t create anything magical. It simply asked the kernel to start a new process (the Redis server) inside a set of namespaces and cgroups.
Sysxplore is an indie, reader-supported publication.
I break down complex technical concepts in a straightforward way, making them easy to grasp. A lot of research goes into every piece to ensure the information you read is as accurate and practical as possible.
To support my work, consider becoming a free or paid subscriber and join the growing community of tech professionals.
Differentiating Container Processes from Host Processes
Now that Redis is running, we can observe it directly from the host. But how can we tell whether a process belongs to a container or is running natively on the system?
Let’s first look at all processes related to Redis:
$ ps -ef --forest The --forest flag displays processes in a tree format, showing parent–child relationships. In the output, notice that your redis-server process isn’t alone, it appears as a child of a parent process containerd-shim-runc-v2.
That parent process is part of Docker’s runtime layer. When you start a container, Docker uses containerd (its underlying daemon) to spawn a lightweight runtime process called a shim. This shim is responsible for keeping the container process alive even if the Docker daemon restarts, and it acts as a middle layer between Docker and the containerized process.
So, when you see something like this:
 /usr/bin/containerd-shim-runc-v2
 \_ redis-server *:6379
it confirms that your Redis process is running inside a container. If you installed Redis directly on the host, its parent process would typically be systemd or your shell, not a container runtime shim.
You can also confirm which containers are running using Docker itself:
$ docker psThis command lists active containers and gives you their names, IDs, images, and status. It’s a simple way to cross-check what you’re seeing from the system-level ps output.
If you want to go a step further and identify the exact process ID of a container’s main process on the host, run:
docker inspect -f ‘{{.State.Pid}}’ redis-demoThis tells you the PID assigned by the kernel to the container’s init process, the same one you can see in your ps tree or inside /proc.
Exploring Containers Through the /proc Filesystem
Now that we’ve confirmed containers are simply processes, let’s take a closer look inside one, without using Docker commands.
Linux exposes a virtual filesystem called /proc, which provides a live view of the system and every process running on it. Each process has its own directory under /proc named after its process ID (PID). Inside that directory, you’ll find details such as its open files, environment variables, namespaces, and even its root filesystem.
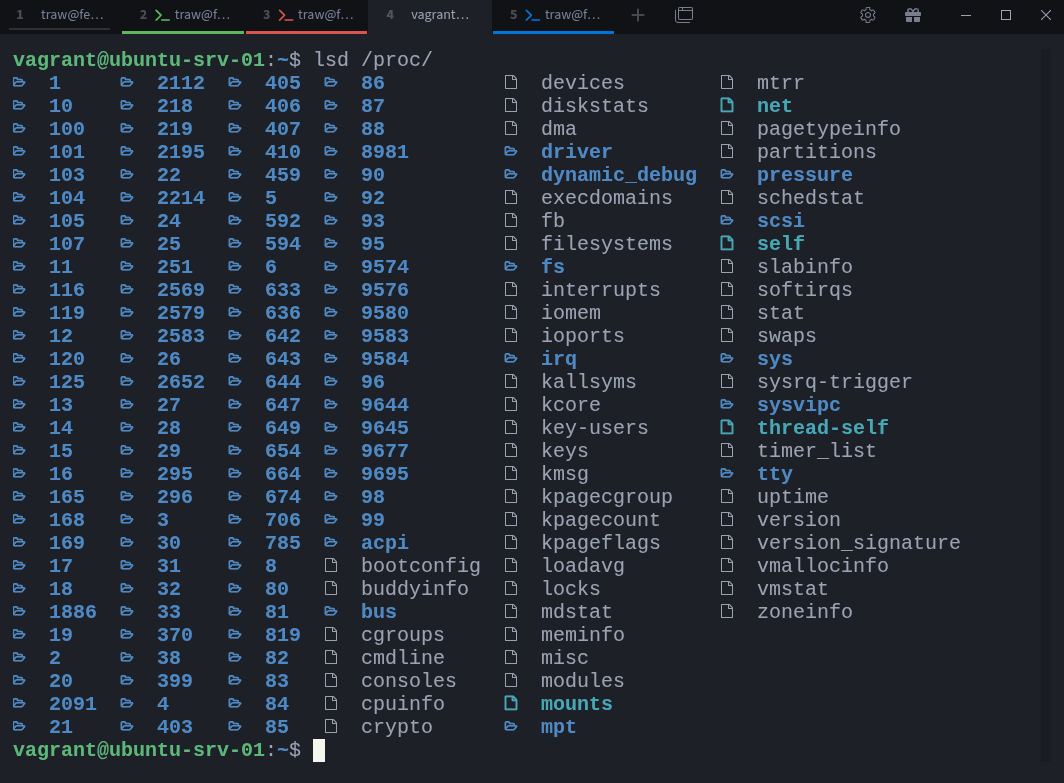
Let’s list the top-level contents of /proc:
$ ls /procYou’ll see a mix of files (like cpuinfo, meminfo, and uptime) and directories named with numbers, each number representing a process ID. For example, /proc/1 usually corresponds to systemd, the init process of the host.
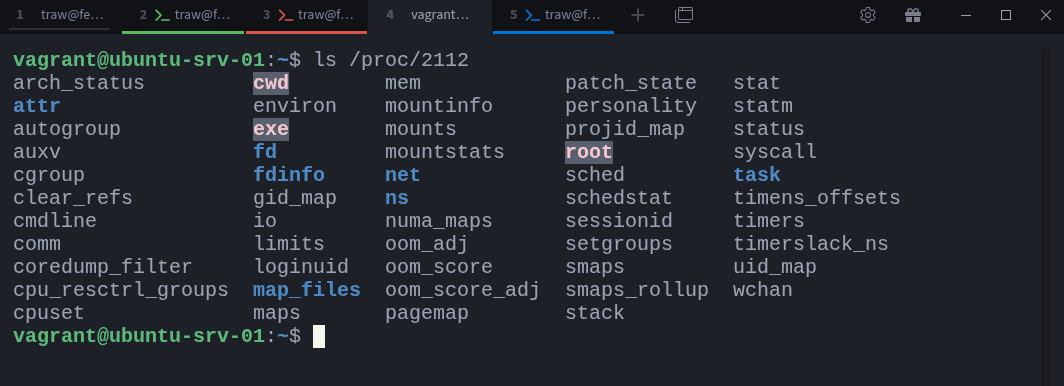
Earlier, we saw that our Redis container process had a PID of 2112. That means everything about that container can be inspected under /proc/2112.
$ ls /proc/2112This directory gives you a complete snapshot of that process’s world: its open file descriptors, mounts, environment, and namespace references. One particularly interesting entry is the root symlink:
$ sudo ls -l /proc/2112/rootThis points to the root filesystem as seen by the Redis container. If you navigate into it (using sudo), you’ll be effectively looking at the container’s filesystem from the host:
$ sudo ls /proc/2112/rootYou’ll notice it looks just like the container’s internal filesystem. You can even create or modify files here:
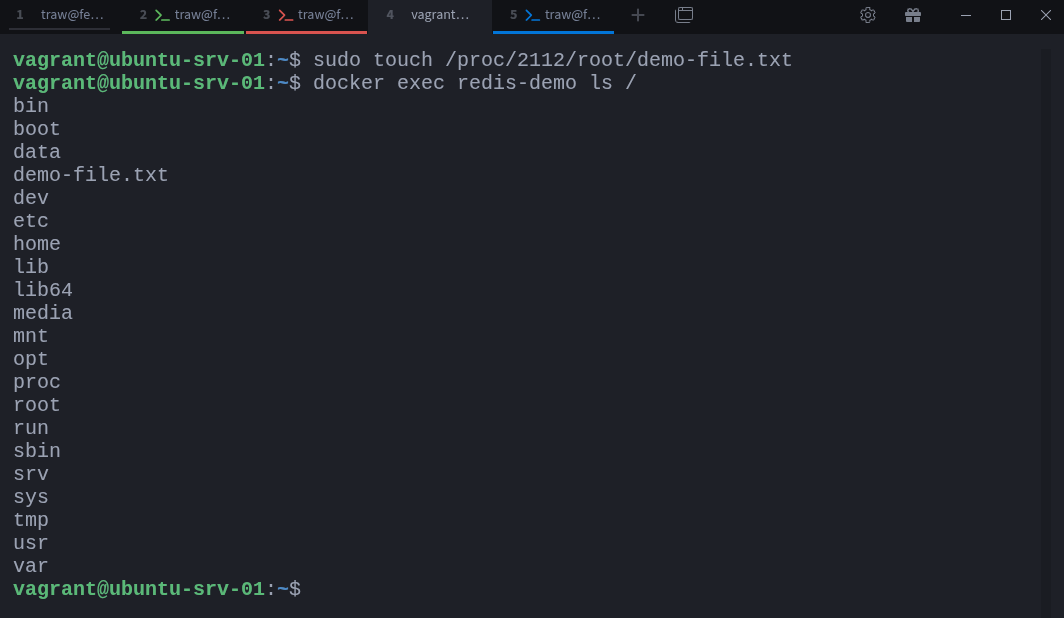
$ sudo touch /proc/2112/root/demo-file.txtThat file now exists inside the container. You can verify it by checking from within Docker:
$ docker exec redis-demo ls /You’ll see demo-file.txt listed among the files. This experiment demonstrates a powerful fact: since containers are just processes, you can inspect and even manipulate them through the kernel’s /proc interface, no docker exec required.
TIP
Be careful when modifying files this way, /proc/[PID]/root gives you direct access to a live container’s filesystem. It’s incredibly useful for forensics or troubleshooting but can cause unintended side effects if used carelessly.
Managing Containers Like Regular Processes
Because containers are just processes, you can control them using the same tools you’d use for any other Linux process. For example, you can stop a container by sending it a signal directly, without ever touching the Docker CLI.
Start by checking which containers are currently running:
$ docker psNow identify the PID of your Redis container (if you don’t already have it):
$ ps -fC redis-serverHere our Redis process has PID 2112. You can stop it by sending a SIGKILL signal with the kill command:
$ sudo kill -9 2112Check again with Docker:
$ docker psThe Redis container will no longer be listed, because when you killed its process, the container stopped. Docker simply treats that process as the container’s main entry point (PID 1 inside its namespace). Once it exits, the container is considered stopped.
IMPORTANT
This method bypasses Docker’s normal shutdown sequence, which gracefully stops containers by sending a SIGTERM first and giving processes time to exit cleanly. Using kill -9 should only be done for troubleshooting or testing, not in production.
You can also experiment with other signals. For example:
$ sudo kill -SIGTERM 2112This allows the process to shut down gracefully, mimicking what happens when you run docker stop redis-demo.
This hands-on test reinforces a simple truth: container runtimes like Docker are management layers. They track and coordinate Linux processes, but the actual isolation and control happen entirely within the kernel.
Looking Ahead
What we’ve seen in this part is the reality behind containerization: containers aren’t special kernel objects or miniature virtual machines, they’re simply Linux processes running inside a collection of namespaces and controlled by cgroups.
By examining running containers with tools like ps and exploring their directories under /proc, you’ve seen how every container maps directly to a process on the host. You’ve also learned that because of this, you can interact with containers at the process level, inspecting, signaling, or even modifying them without any container tooling.
This perspective is crucial to understanding how container runtimes like Docker or Podman operate. They don’t reinvent process management; they orchestrate it. The Linux kernel does all the real isolation work.
In the next part of the series, we’ll move deeper into that isolation and explore Network Namespaces, the feature that gives each container its own independent network stack, IP address, and routing table. You’ll learn how to create network namespaces manually, connect them using virtual Ethernet pairs, and see exactly how Docker wires containers together behind the scenes.
Thanks for reading!
If you enjoyed this content, don’t forget to leave a comment, like ❤️ and subscribe to get more posts like this every week.


That was a really cool breakdown of Docker and namespaces. I personally had never thought about how they work before. Thanks! I will be wait for the next part!