
Spin Up Linux Virtual Machines Quickly with KVM Using Cloud Images

When most people start with virtualization, they reach for tools like VirtualBox or VMware.
You install the software, open the interface, create a new virtual machine, attach an ISO, and go through the operating system installation step by step.
It works.
Linux also provides a native virtualization stack built around KVM and QEMU.
With it, you can work directly with virtual machine disk images and build systems in a faster and more flexible way.
Instead of performing a full operating system installation each time, you can start from an existing image, prepare it for your environment, and run it as a virtual machine.
This approach is common in real-world environments where systems need to be created quickly, tested, replaced, or rebuilt without repeating the same installation process each time.
In this guide, you will use KVM to build a simple lab environment by importing and working with disk images.
You will go through the process step by step, from preparing the image to creating the virtual machine and accessing it.
Checking if your system supports virtualization
Before working with KVM, your system needs to support hardware virtualization.
Most modern CPUs already support it, but it’s worth verifying.
Run the following command:
$ grep -E 'vmx|svm' /proc/cpuinfo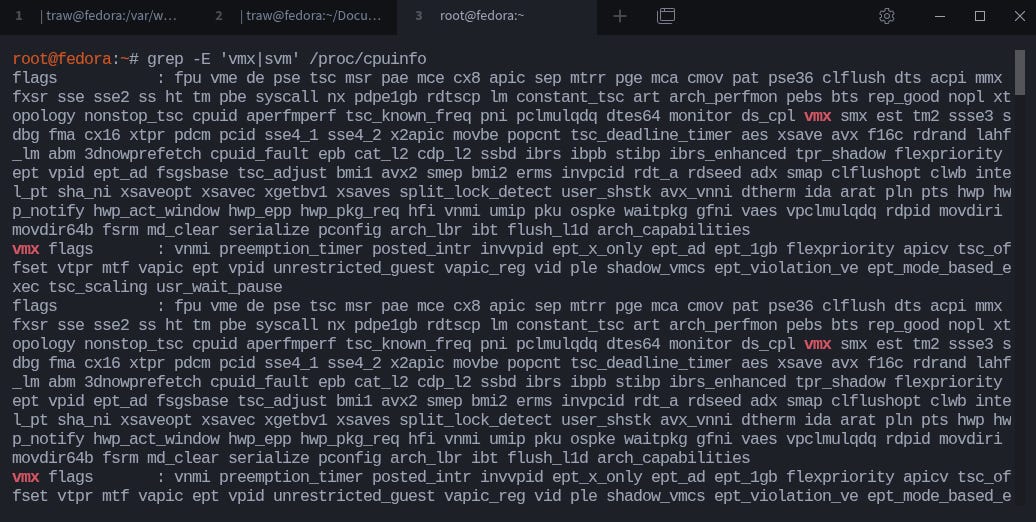
This command looks inside /proc/cpuinfo, which contains information about your processor, and searches for specific flags.
The vmx flag indicates Intel virtualization support, while svm indicates AMD virtualization support.
If your system supports virtualization, you should see one of these flags in the output, usually repeated across multiple lines.
For example, you might see something like vmx or svm listed among the CPU features.
If you only want to confirm support without scrolling through the output, you can return the number of occurrences instead:
$ egrep -c '(vmx|svm)' /proc/cpuinfo
A value greater than 0 confirms that virtualization is supported.
If these command returns no output, virtualization is either not supported or disabled in the BIOS or UEFI settings. In most cases, it is simply disabled, and you can enable it from your firmware settings under options such as Intel VT-x or AMD-V.
KVM relies on hardware virtualization to run virtual machines efficiently. Without it, you won’t be able to use KVM as expected.
Installing the KVM tools
KVM itself is part of the Linux kernel.
What you install are the tools used to create, manage, and interact with virtual machines.
For this demonstration, I’m using Fedora 42.
If you’re running Fedora or any Red Hat–based system, you can install the required packages with:
$ sudo dnf install qemu-kvm libvirt virt-install guestfs-tools genisoimage virt-manager virt-viewer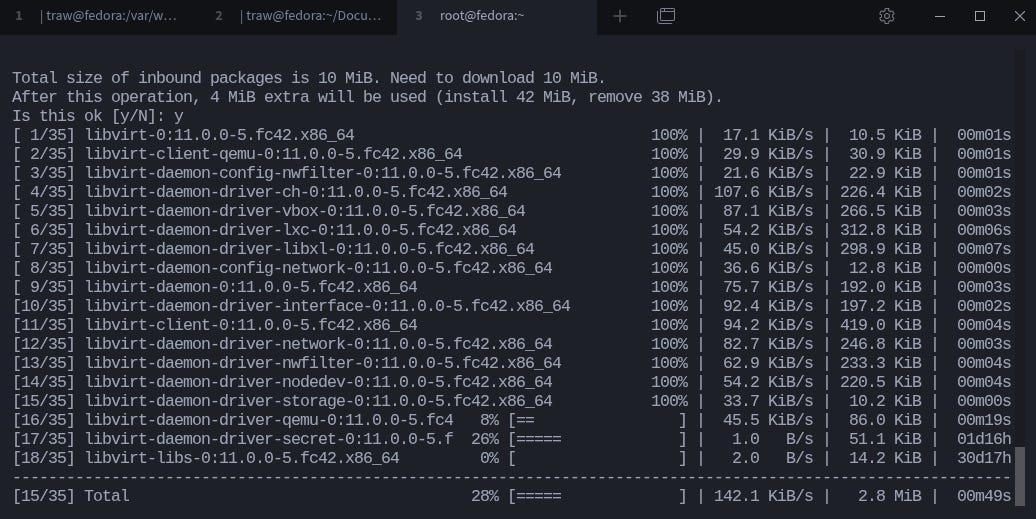
These packages give you everything needed to work with KVM.
qemu-kvm provides the virtualization backend, libvirt handles virtual machine management and networking, and virt-install allows you to create virtual machines from the command line.
The guestfs-tools package includes tools like virt-customize, which you’ll use later to prepare disk images.
The remaining tools, such as virt-manager and virt-viewer, provide graphical access if you need it, while genisoimage is useful when working with ISO files.
If you are using Ubuntu or another Debian-based system, you can install the equivalent tools with:
$ sudo apt install qemu-kvm libvirt-daemon-system libvirt-clients virtinst libguestfs-tools genisoimage virt-manager virt-viewerAfter installation, make sure the libvirtd service is running:
$ systemctl status libvirtd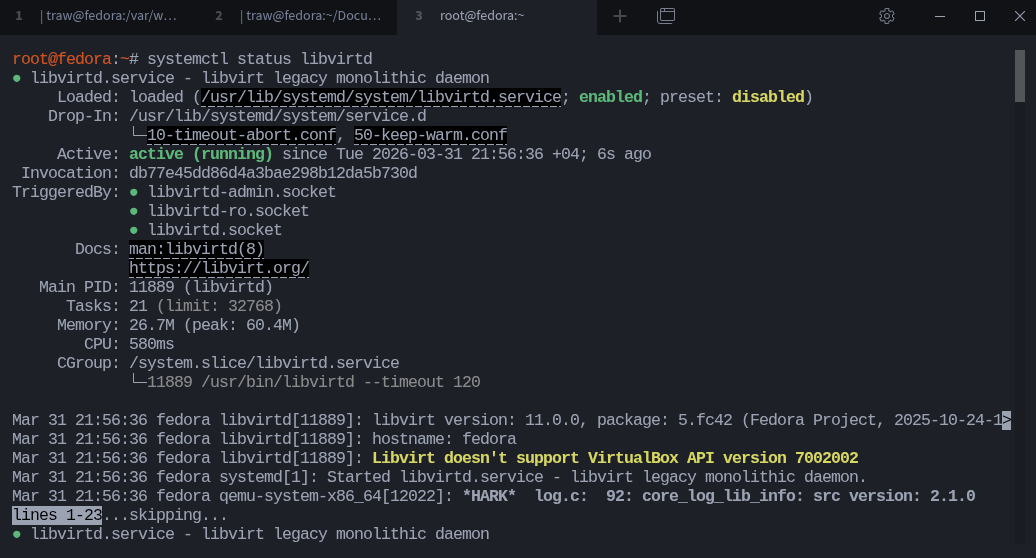
If it is not running, start and enable it:
$ sudo clearsystemctl start libvirtd
$ sudo systemctl enable libvirtd
To manage virtual machines without using sudo, add your user to the libvirt group:
$ sudo usermod -aG libvirt $USERInstead of logging out and back in, you can apply the change immediately with:
$ newgrp libvirtThe newgrp command allows you to switch your current session to a new group without logging out, so the updated permissions take effect right away.
If you prefer not to modify group membership, you can run the commands as root or continue using sudo.
If your user is not part of the libvirt group, you may run into permission errors when creating or managing virtual machines.
Now that the tools are installed, the next step is to get a disk image that we can use to build our lab.
If you’re enjoying this article,
I wrote a 700+ page book teaching Linux step by step, with real examples you can follow and break safely in your own lab.
If you’re serious about learning Linux properly, check it out:
Getting a disk image
To avoid going through a full operating system installation, you’ll work with prebuilt disk images.
These images already contain a minimal operating system and are ready to be used as virtual machines.
Most of these images are distributed in the qcow2 format, which is commonly used with KVM and QEMU.
You can download ready-made images from the OpenStack image repository.
They provide minimal images for distributions like RHEL, Fedora, and Ubuntu.
These images are lightweight and designed to boot quickly, which makes them ideal for testing and lab environments.
For this demonstration, I’ll be using the lastest cloud image from Rocky Linux.
You can download it from their official site.
Look for the Rocky Linux 10 cloud image (qcow2).
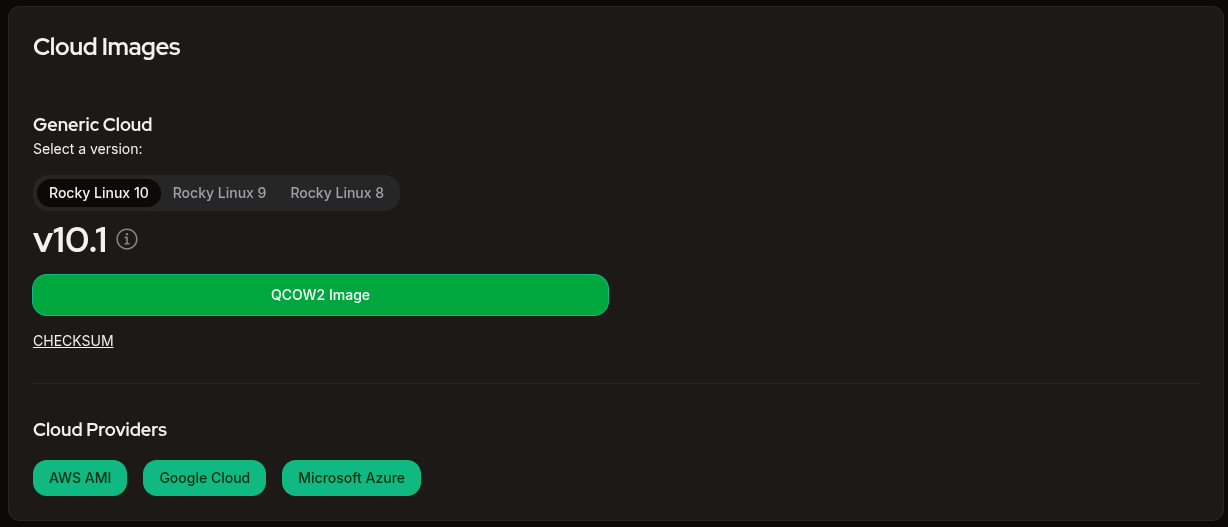
Cloud images are minimal by design and are intended to be customized and deployed quickly.
Once you’ve downloaded the image, move it to the default directory used by libvirt:
$ sudo mv Rocky-10-GenericCloud-Base.latest.x86_64.qcow2 /var/lib/libvirt/images/rock-10.qcow2This is where libvirt expects virtual machine disk images to be stored.
In the example, I have moved and renamed the image to a new name (rock-10.qcow2)to make things simple.
The image is small when downloaded, but it will grow as you use it.
Make sure you have enough disk space available, especially if you plan to create multiple virtual machines.
At this point, you have a base image ready.
The next step is to prepare it for your environment before turning it into a virtual machine.
Preparing the disk image
The image you downloaded is minimal and not ready for direct use.
Cloud images are designed to be initialized dynamically, usually through tools like cloud-init.
For this setup, you’ll prepare the image manually so it behaves like a normal system.
To modify the image, you’ll use the virt-customize tool.
Run the following command:
$ sudo virt-customize \
-a /var/lib/libvirt/images/rock-10.qcow2 \
--hostname rocky-10-kvm-lab \
--root-password password:root \
--uninstall cloud-init \
--selinux-relabel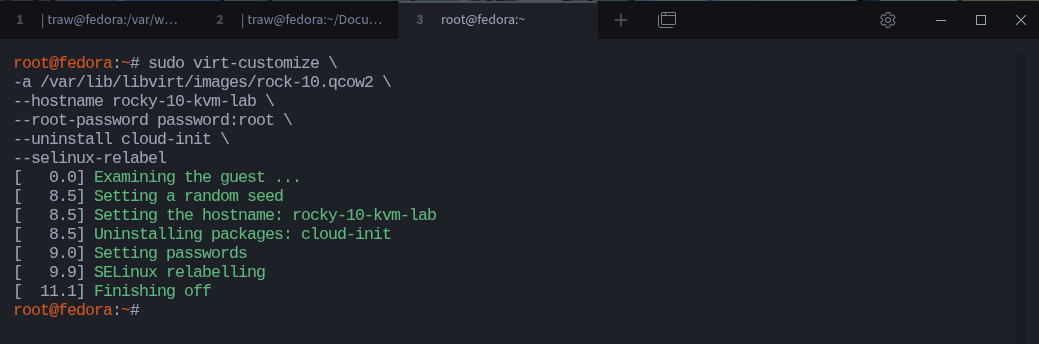
This command modifies the disk image before it is even booted.
The -a option specifies the path to the image.
The --hostname option sets the hostname of the virtual machine.
The --root-password option defines the root password. In this case, it is set to root.
The --uninstall cloud-init option removes cloud-init from the image. This avoids delays during boot, since the system will no longer wait for cloud-init configuration.
The --selinux-relabel option ensures that file contexts are correctly restored after making changes to the image. This is important on systems like Rocky Linux, Fedora, and other SELinux-enabled distributions.
The image must not be running when you use virt-customize. You are modifying it offline.
The virt-customize tool provides many more options than what is shown here. You can explore them using the manual pages (man virt-customize) and experiment based on your needs.
Now, the image is configured and ready to be used as a virtual machine.
The next step is to import it into KVM and create the virtual machine.
Creating the virtual machine
Now that the image is prepared, you can import it into KVM and create a virtual machine.
Run the following command:
$ sudo virt-install \
--name rocky-10-kvm-lab-demo \
--memory 1024 \
--vcpus 1 \
--disk /var/lib/libvirt/images/rock-10.qcow2 \
--import \
--os-variant rocky9.0 \
--noautoconsole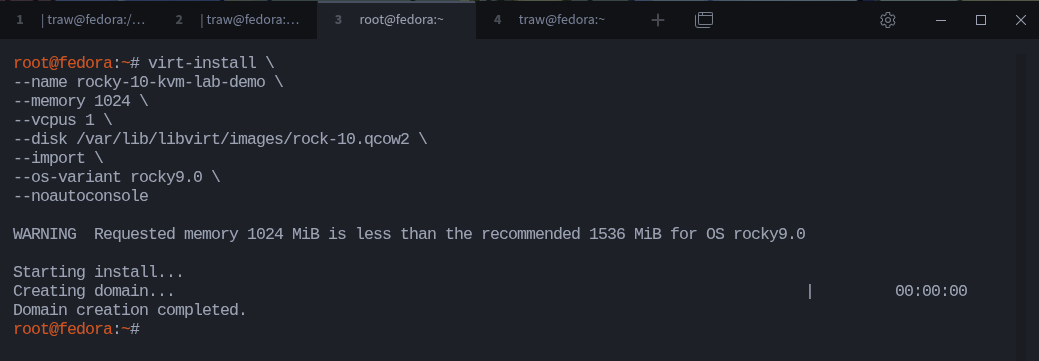
This command creates a virtual machine using the existing disk image.
The --name option defines the name of the virtual machine.
The --memory option sets the RAM in megabytes, and --vcpus defines how many virtual CPUs the system will use.
The --disk option points to the image you prepared earlier.
The --import option tells KVM to use the existing disk instead of installing a new operating system.
The --os-variant option helps optimize the virtual machine configuration for a specific operating system.
To see the operating systems available on your system, you can run:
$ osinfo-query os
This command queries the local OS information database and lists the operating systems recognized by libosinfo.
You can achieve the same thing with:
$ virt-install --osinfo list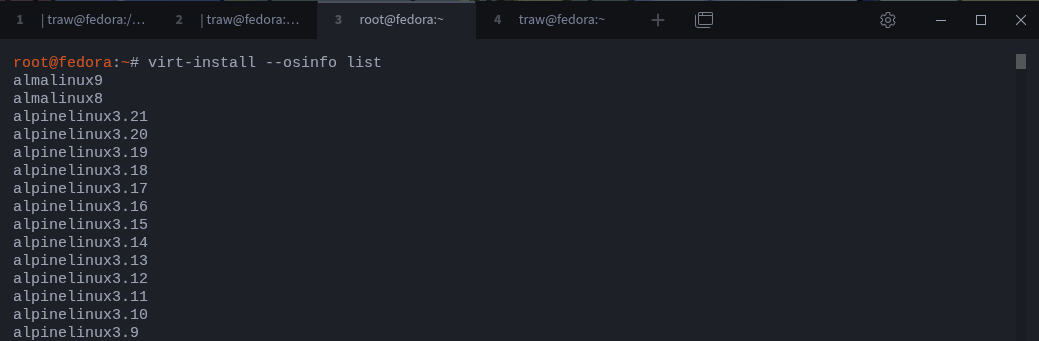
But osinfo-query os is prefered since it provides additional info.
If you want to narrow the output, you can pipe it to grep. For example:
$ osinfo-query os | grep -i rocky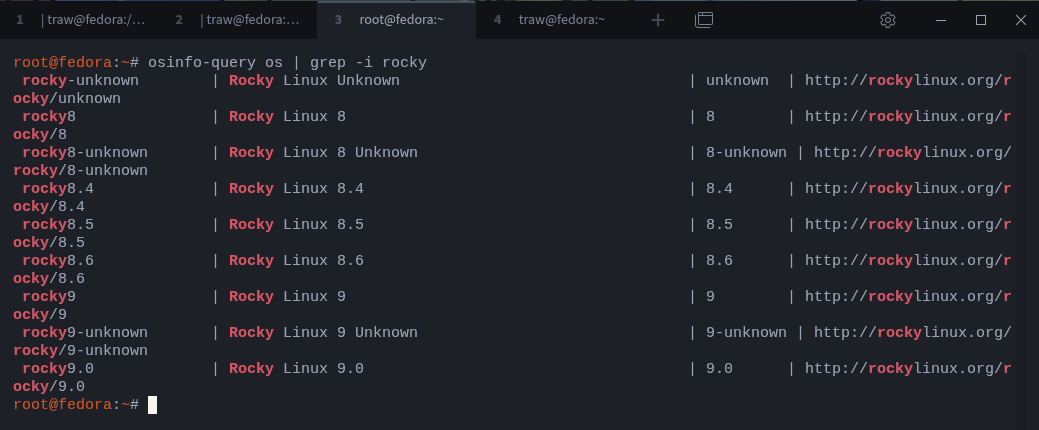
On my system, the latest available entry is rocky9.0.
However, the image used in this demonstration is Rocky Linux 10.1.
You can still use the closest available match when specifying the operating system.
You can also use the newer --osinfo option, which is based on the same underlying database and provides a more flexible way to define the operating system:
--osinfo detect=on,name=rocky9.0.This tells libvirt to use information from the OS database to configure the virtual machine.
The detect=on option first tries to detect the operating system from the disk image.
If detection fails, it falls back to the value provided with name=rocky10.0.
This helps ensure that the virtual machine is created with suitable defaults for that operating system.
Accessing the virtual machine
Once the virtual machine is created, it starts running in the background.
To confirm that it is running, you can list active virtual machines:
$ virsh list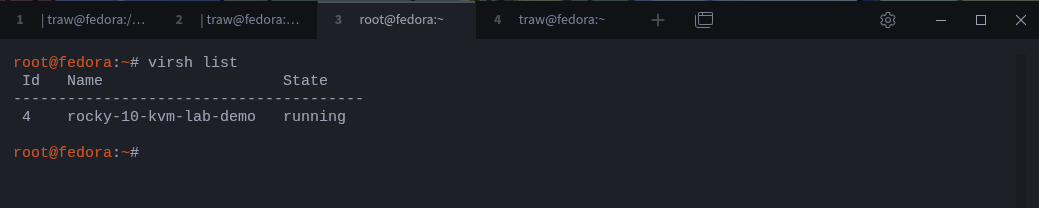
To connect to the system, you first need its IP address.
You can retrieve it using:
$ sudo virsh domifaddr rocky-10-kvm-lab-demo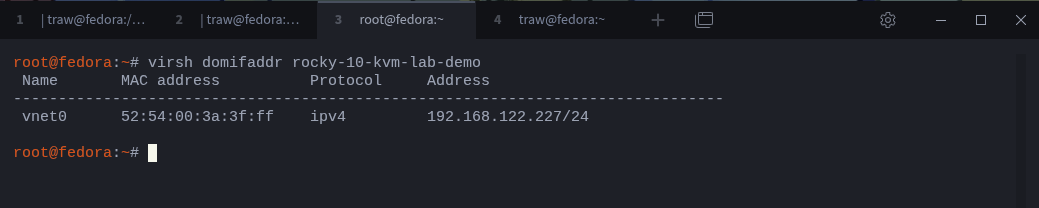
This command shows the network interfaces associated with the virtual machine, including the assigned IP address.
Look for an entry under the address column.
Once you have the IP address, connect using SSH:
$ ssh root@192.168.122.227Use the root password you configured earlier. N
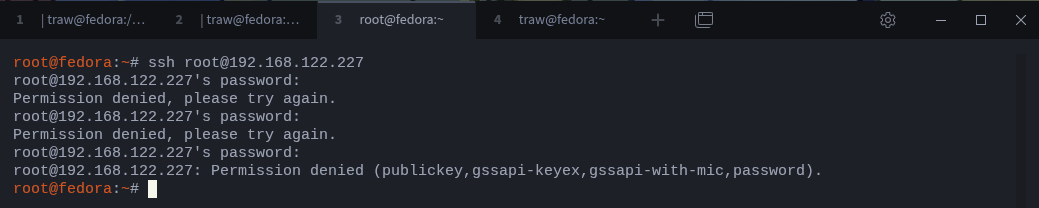
You’ll notice the password does not work. SSH attempts different authentication methods and eventually fails with:
Permission denied (publickey,gssapi-keyex,gssapi-with-mic,password)This is a good opportunity to understand what is happening.
On many cloud images, especially Rocky, root login using a password over SSH is disabled by default, even if a root password is set.
This means the system allows SSH access, but refuses password-based login for root.
A few common reasons for this behavior:
PermitRootLoginis set toprohibit-passwordorwithout-passwordPasswordAuthenticationis disabledThe image is designed to use SSH keys instead of passwords
In this setup, you did not inject an SSH key, so SSH has no valid authentication method to use.
To confirm this, connect to the virtual machine console:
$ sudo virsh console rocky-10-kvm-lab-demoIf the login prompt does not appear immediately, press Enter a few times.
Log in as root using the password root.
Once inside, check the effective SSH configuration:
$ sshd -T | grep -E 'permitrootlogin|passwordauthentication'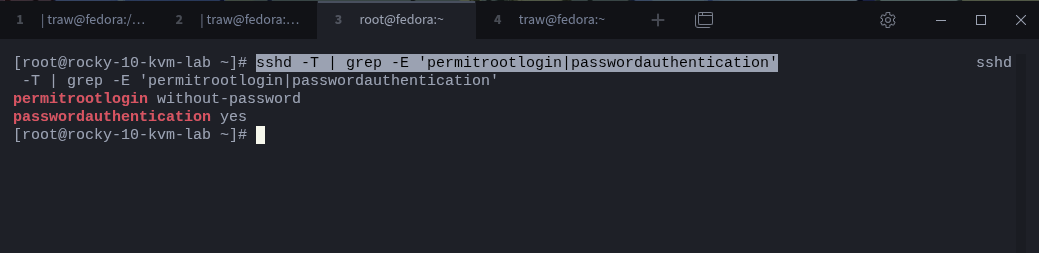
The output clearly explains why the login failed.
passwordauthentication is enabled, but permitrootlogin is set to without-password, which means root login is only allowed using SSH keys, not a password.
You can verify the effective SSH configuration using
sshd -T. This shows the final values after all configuration files and drop-in overrides are applied.
Let’s fix that by creating a drop-in file instead of modifying the main SSH configuration file:
$ printf 'PermitRootLogin yes\nPasswordAuthentication yes\n' > / etc/ssh/sshd_config.d/99-root-login.conf

$ systemctl restart sshd
Now verify the effective configuration again:
$ sshd -T | grep -E 'permitrootlogin|passwordauthentication'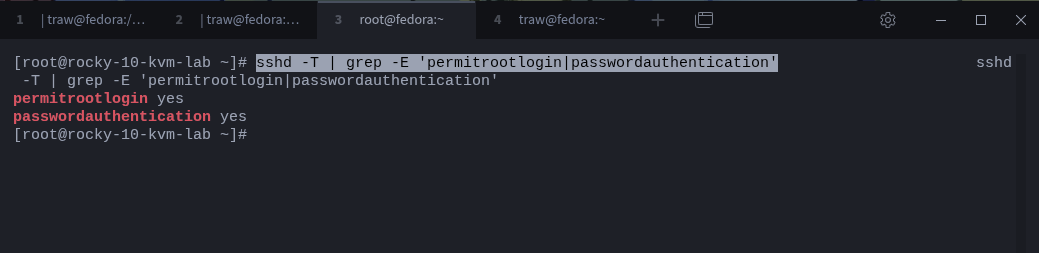
You can now connect using SSH with the root password. First exit the console by pressing Ctrl + ]
$ ssh root@192.168.122.227
If you prefer key-based authentication, you can inject an SSH key when preparing the image with virt-customize.
For example:
$ ssh-keygen -t rsa

$ sudo virt-customize \
-a /var/lib/libvirt/images/rock-10.qcow2 \
--ssh-inject 'root:file:/root/.ssh/id_rsa.pub'
This adds your public key to the image so you can connect without a password:
$ ssh root@192.168.122.227If the IP address does not appear, the virtual machine may still be initializing its network.
Give it a few seconds and run the command again.
At this point, you have a working virtual machine running from a prebuilt image.
You can log in, install packages, test configurations, and experiment freely without affecting your main system.
Every virtual machine you create from an image starts from the same baseline. If you need multiple systems, create a copy of the image for each virtual machine. A single disk image should not be shared between multiple VMs.
Stopping the virtual machine
Once you are done working with the virtual machine, you can stop it.
To see running virtual machines:
$ virsh list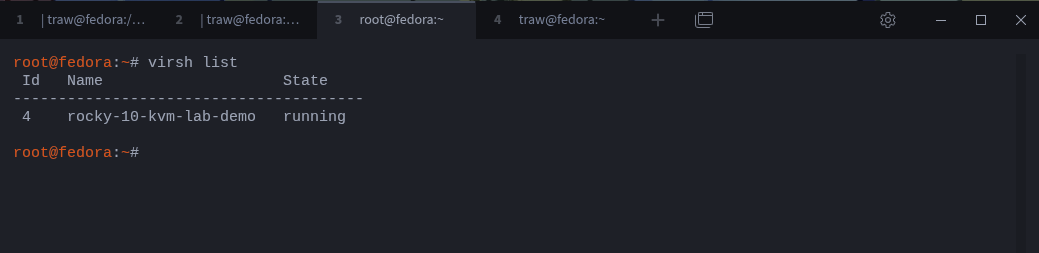
To stop the virtual machine gracefully:
$ virsh shutdown rocky-10-kvm-lab-demo
This sends a shutdown signal to the guest operating system, allowing it to close services and unmount filesystems properly.
If the virtual machine does not respond, you can force it to stop:
$ virsh destroy rocky-10-kvm-lab-demoThis stops the virtual machine immediately, similar to cutting power.
If you want to start it again later:
$ virsh start rocky-10-kvm-lab-demoClosing
At this point, you have a working virtual machine built from a prebuilt image.
No installation wizard. No repeated setup steps.
You took an image, prepared it, and turned it into a running system in a few commands.
This is a faster way to build lab environments.
You can keep a collection of images, adjust them for different use cases, and spin up new systems whenever you need them.
From here, you can go further.
Create multiple virtual machines, connect them together, simulate networks, or test real-world scenarios.
Everything starts from the same idea: take an image, run it, and use it.
That’s it.
Thanks for reading!
If you enjoyed this content, don’t forget to leave a comment, like ❤️ and subscribe to get more posts like this every week.
virt-customize modifying the disk image offline before first boot is the detail that separates a clean lab setup from a messy one. bookmarking this one