
Part 2: SSH Tunnels Deep Dive - Remote Port Forwarding

In the previous part, we walked through local port forwarding and saw how an SSH tunnel can give your machine a private path into a service running on the remote side.
In this part, we’ll flip the direction. Instead of pulling traffic toward the client, we’ll look at remote port forwarding, where the remote machine opens a port and sends traffic back to your local system.
Understanding Remote Port Forwarding
Remote port forwarding works in the opposite direction of local forwarding. Instead of opening a port on your laptop and sending traffic into a remote network, you open a port on the remote machine and send traffic back to your laptop. This is useful when your laptop is running a service that the remote side cannot reach directly, maybe because you’re behind NAT, a firewall, or you simply don’t have a public IP.
A classic example is when you’re developing a web application locally and want someone else to access it. Take James, for instance. He’s been building a website on his laptop and wants to show it to his colleague Kay. The problem? James is sitting behind a private network with no public IP, and incoming connections to his laptop are blocked. Kay has no direct way of reaching James’s machine, and James doesn’t have the time or desire to deploy the site to a public server just for a quick preview.
What James can do, however, is spin up a temporary server on the cloud, something both of them can reach, and use SSH remote port forwarding to expose his local website through that server. The cloud VM opens a port, and anything sent to that port is quietly tunneled back to James’s laptop. From Kay’s perspective, the website looks like it’s being served from the cloud, even though it’s actually running on James’s machine at home. This will make more sense in the lab, so let’s jump right another lab.
Lab Setup
So for this I have setup 3 machines:
james-lap (192.168.70.10) - James’s laptop where the web application is running locally on port 80.
aws-pub-instance (192.168.70.10 and 192.168.80.20) - A cloud VM that both James and Kay can access. This machine will act as the SSH server for remote port forwarding.
kay-pc (192.168.80.10) - Kay’s computer from which she wants to access James’s local web application.
Notice the aws-pub-instance has two network interfaces, one connected to James’s network (192.168.70.0/24) and the other connected to Kay’s network (192.168.80.0/24). This setup allows both James and Kay to reach the aws-pub-instance. Normally, a cloud VM would have a normally single public IP address, but for the sake of this lab, we are simulating the cloud environment using private IPs.
NOTE:
If you skipped the first part or haven’t set up the lab yet, the GitHub repository includes the full setup so you can start from here.
Verifying Connectivity
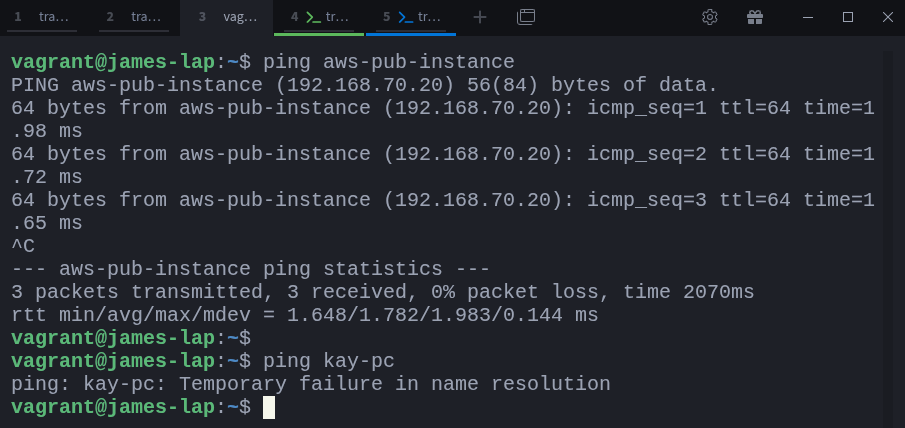
Both kay and james cannot directly reach each other due to network restrictions, but they can both access the aws-pub-instance. which we can confirm by pinging from both sides: From james-lap:
$ vagrant ssh james-lap
$ ping aws-pub-instance
$ ping kay-pc
from kay-pc:
$ vagrant ssh kay-pc
$ ping aws-pub-instance
$ ping james-lap
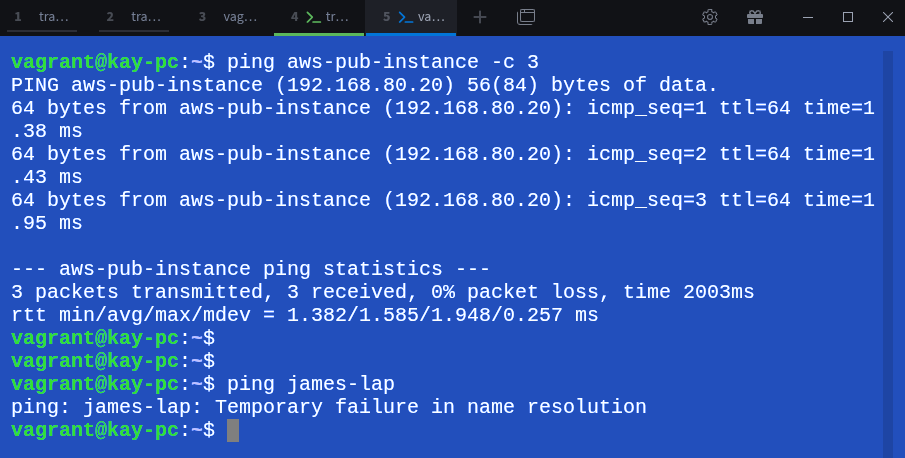
As you can see, both James and Kay can reach the aws-pub-instance, but they cannot reach each other directly. and Also just to be sure that james’s local web application is running, let’s curl it from james-lap:
$ curl localhost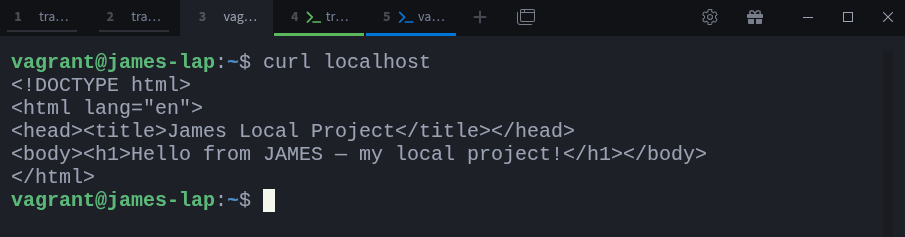
Great! The web application is up and running on James’s laptop. Now, let’s set up the remote port forwarding from james-lap to aws-pub-instance.
Creating the Remote SSH Tunnel
The syntax looks similar to local port forwarding, but with the -R option and reversed order of ports:
$ ssh -N -R <remote-address>:<remote_port>:<local_address>:<local_port> user@remote_public_ssh_serverAgain we will break this down in a bit, but for now, let’s run the command on james-lap to create the remote tunnel:
